Welcome to Flair’s documentation!
New: Flair can now be conda installed using
conda create -n flair -c conda-forge -c bioconda flair
conda activate flair
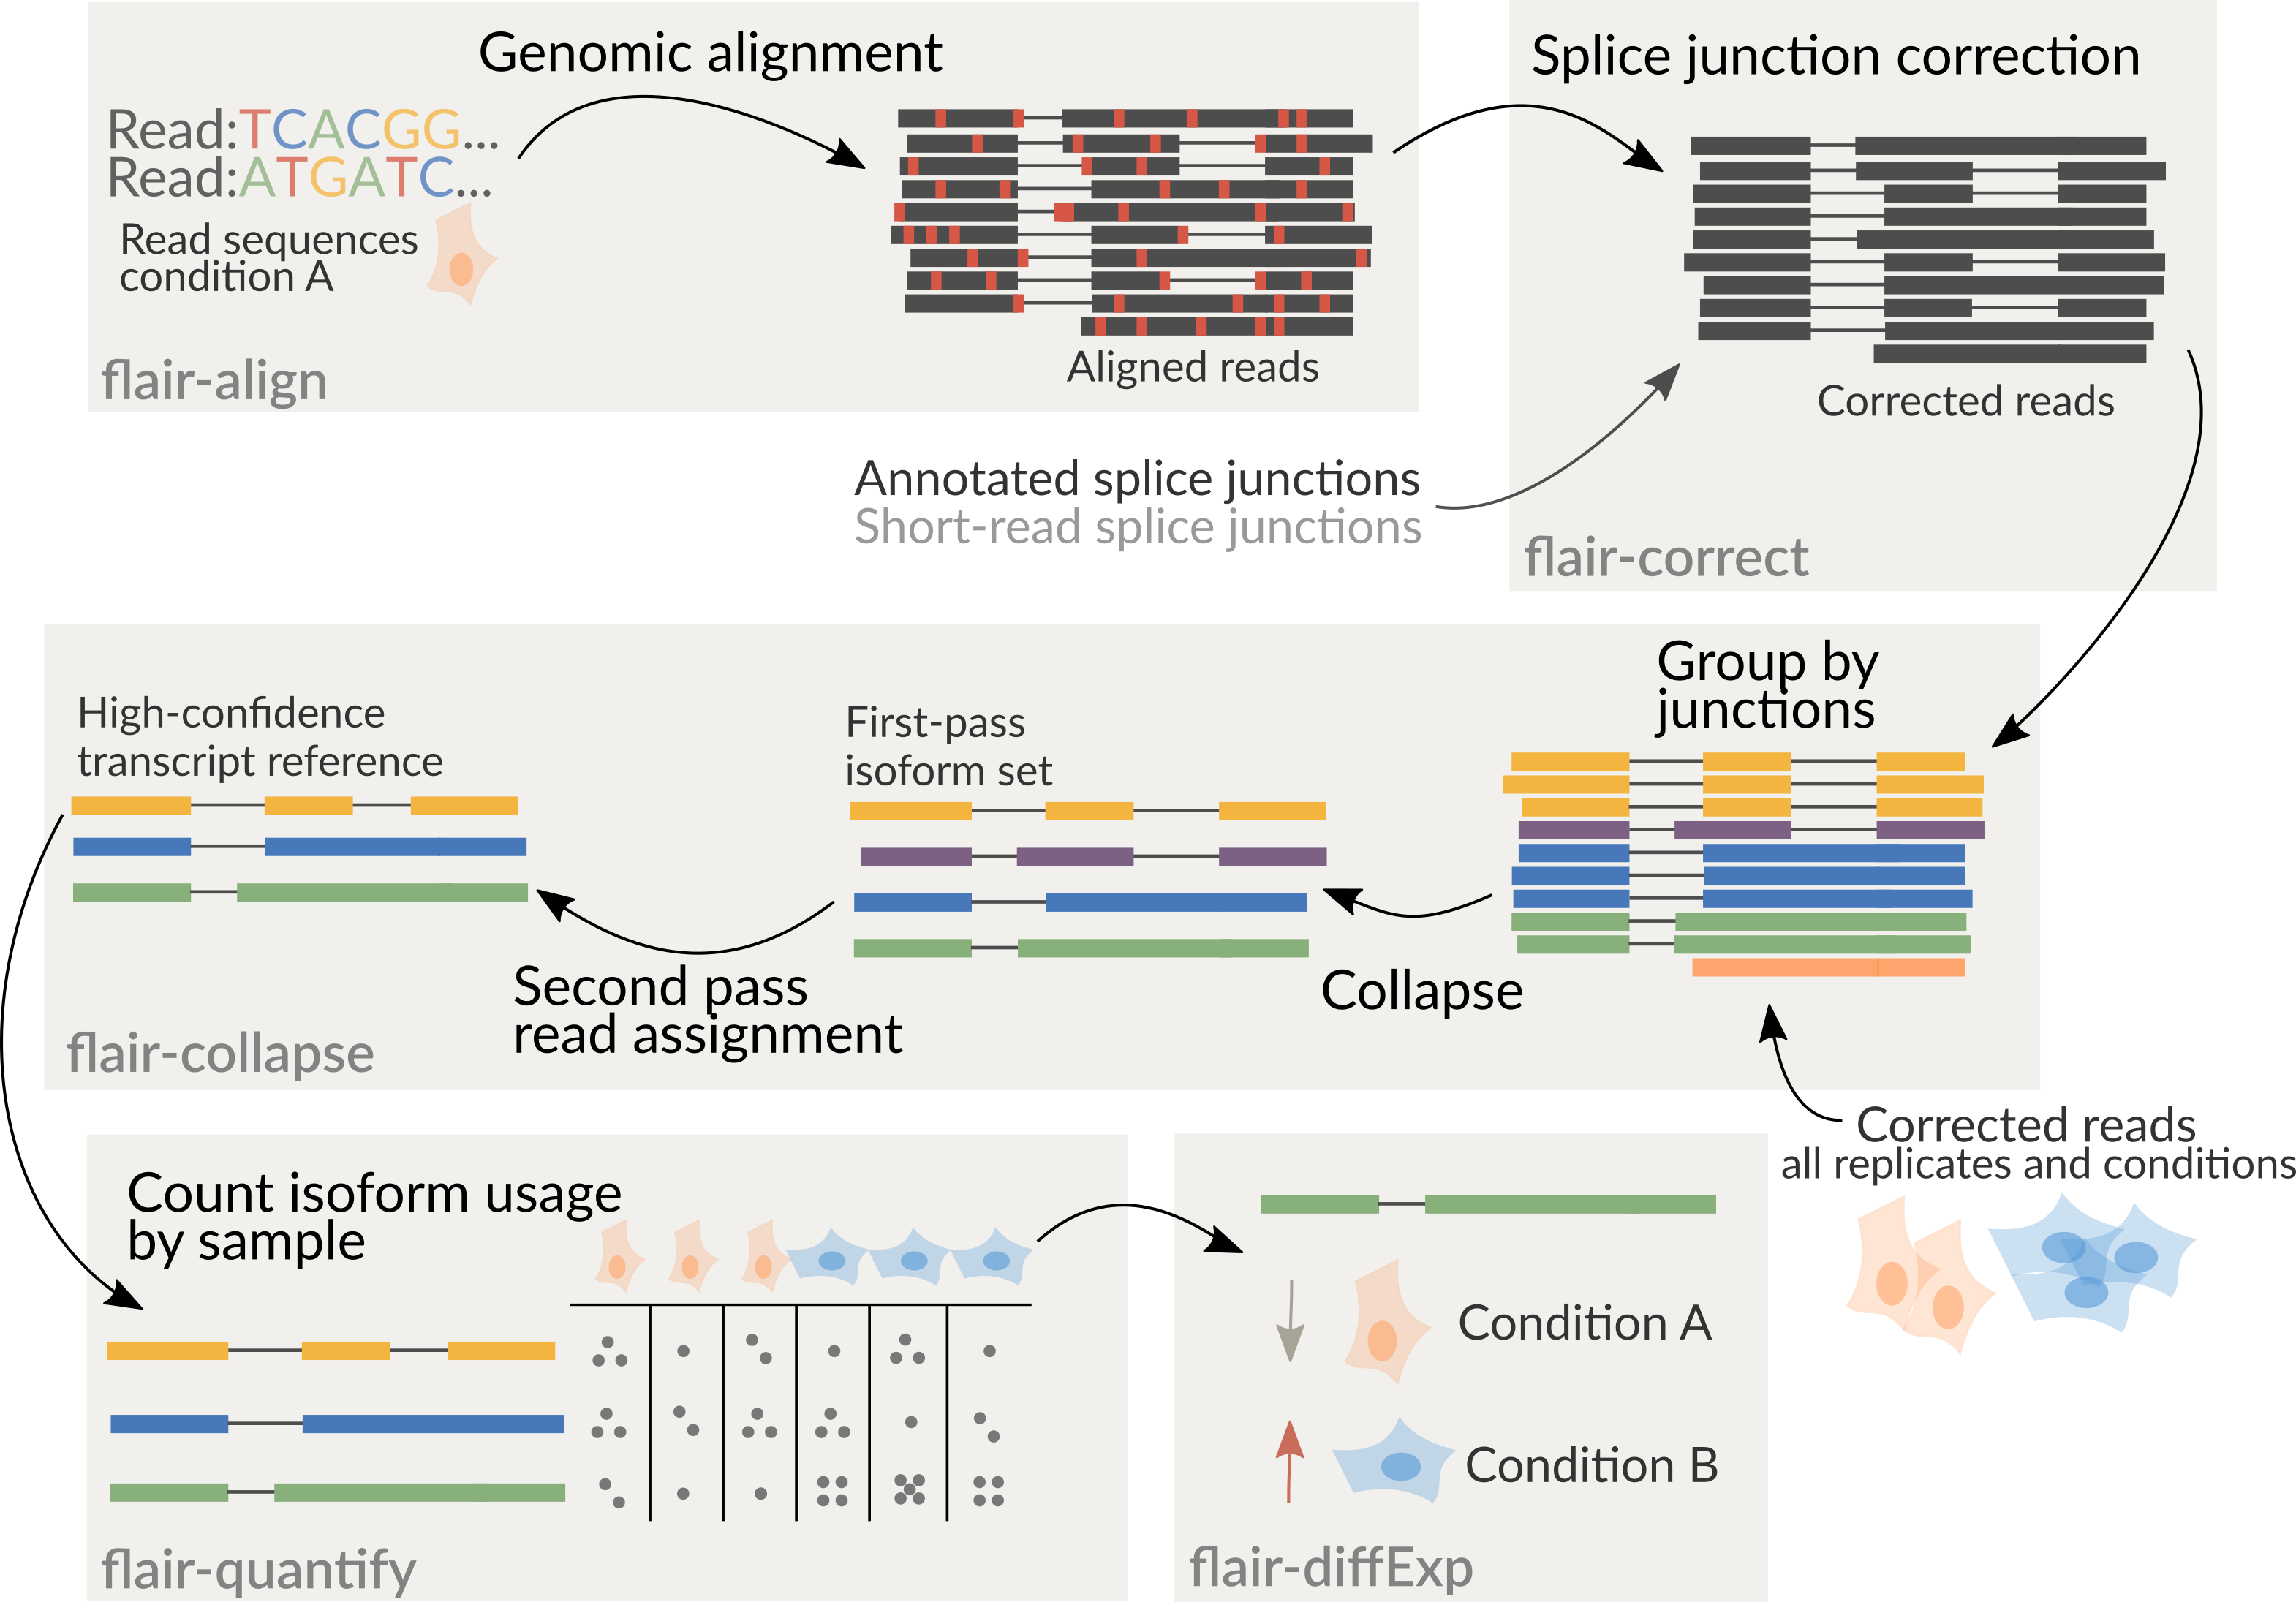
FLAIR can be run optionally with short-read data to help increase splice site accuracy of the long read splice junctions. FLAIR uses multiple alignment steps and splice site filters to increase confidence in the set of isoforms defined from noisy data. FLAIR was designed to be able to sense subtle splicing changes in nanopore data from Tang et al. (2020). Please read for more description of the methods.

It is recommended to combine all samples together prior to running
flair-collapse for isoform assembly by concatenating corrected read
psl or bed files together. Following the creation of an isoform
reference from flair-collapse, consequent steps will assign reads from
each sample individually to isoforms of the combined assembly for
downstream analyses.
It is also good to note that bed12 and psl can be converted
using
kentUtils
bedToPsl or pslToBed, or using bed_to_psl and
psl_to_bed provided in flair’s /bin directory.